Painting a concrete surface, such as concrete driveway, can require more time, tools and skill than its drywall counterparts. Not only must you choose the right paint, but you must also take the right precautionary measures to ensure that all your hard work lasts as long as possible. So, to help you make the most of your brand new concrete paint job, we’ve put together our top tips and tricks for using concrete paint.
Choose Your Paint Carefully
Before you begin anything, you need to ensure that you select the appropriate paint for your project. For outdoor projects, you need to consider the weather, ensuring you select a paint that is moisture and sun resistant. This will ensure it will last as long as possible, as it is equipped against the natural elements. Outdoor paint is available from all good paint stores, although you may also want to consider using an oil-based paint, depending on the specific location of the concrete you wish to paint.
If you’re undertaking an indoor painting project, you have a number of options. Basement concrete paint can be very effective when covering concrete, and this is available via a number of paint and hardware stores. However, you can also use an interior paint acrylic. This all depends on the scale and specifications of your project.
Prepare the Surface
For any painting job, the cleaning and preparing of the surface is the most important step of all—concrete included. If you fail to properly prepare your concrete, as a porous surface, it will tend to trap grease, dirt and oil. All this means that the finish on your paint job won’t be all that you’re hoping for.
So, to begin, remove all dirt and grease from the concrete using a trisodium phosphate, or something which does a similar job. When conducting a job outdoors, it is also important to remove any foliage or excess moss or vegetation that is growing on the foundation. This can be done with a pressure or power cleaner, ridding your wall or floor of all remaining dirt and dust.
Following a pressure clean, you may find that your concrete surface has developed a layer of efflorescence, which is a white powder that can form on concrete when it is moist. This needs to be removed using a chemical found at any local hardware store.
If you are completing an inside job, scrub the wall with a scrub brush as opposed to a pressure cleaner. You should ensure the water is hot and soapy, eliminating any possible traces of bacteria.
Give the Concrete Surface Some TLC
Before you can start painting your concrete surface, you must strip it of any old or excess paint. Indoor strip peeling or blistering paint can be tended to with wire brush, a paint scraper and lots of elbow grease. Outdoor jobs however can be tended to with a power washer.
Following this, it is important to repair any cracks or blemishes that may have arisen over years of wear and tear. Using a concrete patch and mixer, use a trowel to fill holes and smooth over imperfections. This will give you a flat surface to begin the preparation.
Seal the Surface
If paint is applied to a wall that has not been properly sealed, then it will not adhere properly. Water can move unnecessarily within porous concrete, therefore sealing a wall is necessary in order to prevent moisture from absorbing and seeping in, as well as preventing mould from growing.
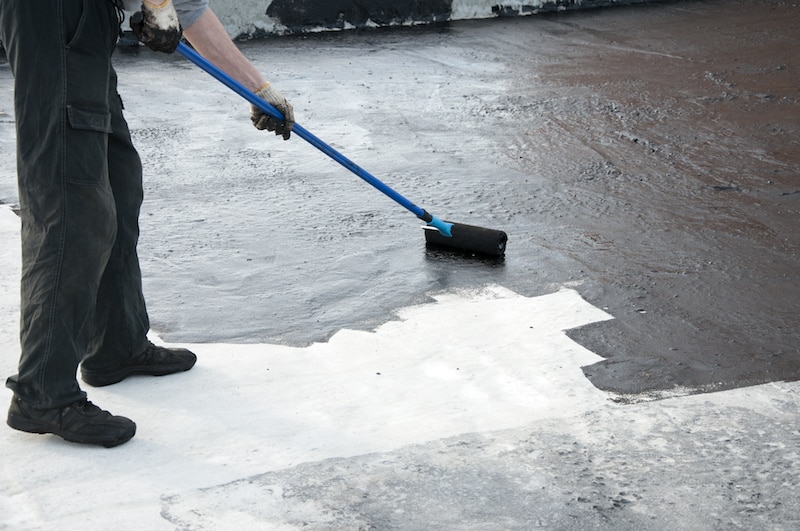
Concrete sealer is available at most home improvement or hardware stores, allowing you to purchase it quite easily and readily. Roll one coat of concrete sealer on the wall, allowing it to dry over night.
Simple!
Prime the Wall
Concrete or block primer, can help to even out the surface and fill existing pores in the wall. For both interior and exterior walls and foundations, use an exterior-grade block filler.
You can use brushes or rollers to apply the paint, ensuring that the primer is applied evenly. Then allow 24 hours for the primer to dry.
Paint the wall
When painting a concrete wall, there are a number of different paint options to choose from. However, masonry paint is one of the most popular and effective. This paint type contains binders that can contract and expand with the concrete, as opposed to exterior house paint that may crack and peel after time.
Masonry paint can be tinted and has a much thicker consistency than exterior paint. It can be applied with a high capacity roller, a texture roller or a masonry brush. If you are looking to spray-paint cement using masonry, ask your local paint store for the best product for this purpose.
No matter your application, paint should be applied in a minimum of three thin layers – all being left to dry for a day between coats. The paint should show as little streaks or brush strokes as possible, creating a seamless concrete surface that improves the visuals of the space.
Seal the Concrete
Applying a concrete sealer can assist in a variety of ways. Not only can it enhance the appearance of your concrete generally, but it can also:
- Enhance the concrete colour
- Protect against dirt and stains
- Repel moisture
- Help to protect against mould and mildew growth
- Enhance the ease of cleaning
- Protect against salts coming through
- Helps to prevent surface dusting
- Reduces rust stains
Cover your concrete with two coats of concrete sealer, allowing adequate time for each layer to dry.
While painting concrete can be tricky, it can be a great way to enhance the overall appearance of your space. By following these steps, you can create a stress-free painting experience, allowing you to maximise your time and have your concrete looking amazing in no time!